<?xml version="1.0" encoding="utf-8"?><feed xmlns="http://www.w3.org/2005/Atom"><generator uri="https://gohugo.io/" version="0.147.9">Hugo</generator><link href="https://bupd.xyz/blogs/feed.xml" rel="self" type="application/atom+xml"/><link href="https://bupd.xyz/blogs/" rel="alternate" type="text/html"/><updated>2026-06-10T00:24:56Z</updated><id>https://bupd.xyz/blogs/feed.xml</id><title type="html">Prasanth Baskar</title><subtitle>Prasanth Baskar writes about open source, Kubernetes, Harbor, platform engineering, Linux, and developer tools.</subtitle><author><name>Prasanth Baskar</name><email>bupdprasanth@gmail.com</email></author><entry><title type="html">Manufacturing Software Like Chips</title><link href="https://bupd.xyz/blogs/manufacutring-software-like-chips/" rel="alternate" type="text/html" title="Manufacturing Software Like Chips"/><published>2026-06-10T00:00:00Z</published><updated>2026-06-10T00:24:56Z</updated><id>https://bupd.xyz/blogs/manufacutring-software-like-chips/</id><content type="html" xml:base="https://bupd.xyz/blogs/manufacutring-software-like-chips/"><![CDATA[<p>What if software is manufactured like semiconductors?</p>
<p>That question sounds strange only because software still carries the mythology of craft. We talk about individual developers, clever prompts, velocity, tickets, and heroic debugging sessions. We still design many organizations as if humans are the primary producers of code.</p>
<p>That assumption is starting to break.</p>
<p>Code is becoming cheap. Not free, not automatically good, but cheap enough that writing it is no longer the only scarce part of the system. When code becomes cheap, the bottleneck moves somewhere else: design, verification, quality control, traceability, packaging, release systems, and production governance.</p>
<p>That is why I think software needs to learn from manufacturing.</p>
<h2 id="the-wrong-lesson-from-ai-coding">The wrong lesson from AI coding</h2>
<p>The industry currently spends too much energy asking: how do I prompt an agent better?</p>
<p>That is the shallow layer. Prompts matter, but prompts are not the factory. A prompt in a Markdown file is not a production system, a quality model, a traceability chain, or a release process.</p>
<p>If AI agents are the manufacturers of software, then the platform is the factory.</p>
<p>The factory decides what inputs are accepted. It defines how work is decomposed. It controls which tools are available. It checks whether the output matches the specification. It records provenance. It rejects defective artifacts. It moves approved artifacts into production.</p>
<p>Agents do not need to understand the business in the human sense. They need to understand the specification, the constraints, the interfaces, and the acceptance checks.</p>
<h2 id="from-design-artifact-to-production-artifact">From design artifact to production artifact</h2>
<p>Semiconductor manufacturing is not a person walking into a clean room and improvising a chip. There are design artifacts, simulation, verification, masks, process controls, yield analysis, and traceability across the production line.</p>
<p>Software can use the same mental model.</p>
<p>A product idea should become a design artifact. That design artifact should become implementation tasks. Implementation should produce build artifacts. Build artifacts should carry provenance, tests, policy results, and deployment intent. Platforms should move those artifacts through controlled environments.</p>
<p>That maps cleanly to the cloud native world:</p>
<ul>
<li>Design artifacts become issues, PRDs, ADRs, schemas, API contracts, and executable acceptance tests.</li>
<li>Production lines become CI pipelines, GitOps controllers, policy engines, and preview environments.</li>
<li>Manufactured goods become OCI artifacts, container images, Helm charts, SBOMs, attestations, and signed releases.</li>
<li>Quality control becomes tests, static analysis, policy-as-code, vulnerability scanning, and runtime verification.</li>
<li>Traceability becomes Git history, provenance attestations, build logs, deployment records, and registry metadata.</li>
<li>The factory floor becomes Kubernetes, platform APIs, and internal developer platforms.</li>
</ul>
<p>This framing turns software from &ldquo;someone wrote code&rdquo; into &ldquo;a controlled system produced an artifact.&rdquo;</p>
<h2 id="quality-control-becomes-the-center">Quality control becomes the center</h2>
<p>When humans write most code by hand, review often focuses on the code itself. When agents can generate code quickly, reviewing every line as the primary safety mechanism stops scaling.</p>
<p>The review target has to move upward.</p>
<p>We should review the specification. We should review the test harness. We should review the production constraints. We should review the policy boundary. We should review the artifact metadata. Code review still matters, but it is no longer the only gate.</p>
<p>Manufacturing does not rely on inspecting every atom of every chip by hand. It relies on controlled inputs, repeatable processes, sampling, automated verification, and yield signals. Software needs the same shift.</p>
<p>The question becomes: can the platform prove that this artifact satisfies the design?</p>
<h2 id="harbor-oci-and-software-supply-chains">Harbor, OCI, and software supply chains</h2>
<p>This is where my Harbor brain takes over.</p>
<p>If software is manufactured, registries are not just places where images sit. They are warehouses, distribution centers, quality checkpoints, and metadata hubs.</p>
<p>An OCI registry can store more than a container image. It can store charts, SBOMs, signatures, attestations, WebAssembly modules, model artifacts, policy bundles, and other production outputs. The registry becomes part of the manufacturing record.</p>
<p>Harbor already lives in this world: artifact storage, access control, scanning, replication, signing integrations, robot accounts, policies, and governance around distribution. In an agent-heavy future, that kind of infrastructure becomes more important, not less.</p>
<p>The artifact is the unit of production. The registry is part of the factory.</p>
<h2 id="gitops-as-a-conveyor-belt">GitOps as a conveyor belt</h2>
<p>GitOps is usually described as &ldquo;Git as the source of truth.&rdquo; That is true, but the manufacturing analogy makes it sharper.</p>
<p>GitOps is a conveyor belt with reconciliation.</p>
<p>Desired state enters the system. Controllers compare desired state with actual state. Drift is detected. Changes are applied. History is preserved. Rollback exists. The system continuously pulls production toward the approved design.</p>
<p>That is a manufacturing primitive. It is not just deployment automation. It is a repeatable production line for runtime state.</p>
<p>When paired with OCI artifacts, provenance, and policy, GitOps gives us a way to move manufactured software through environments without depending on a human remembering the right sequence of commands.</p>
<h2 id="agents-as-manufacturers">Agents as manufacturers</h2>
<p>The most useful way to think about AI agents is not &ldquo;junior developer&rdquo; or &ldquo;magic coworker.&rdquo; I prefer &ldquo;manufacturing provider.&rdquo;</p>
<p>You give a manufacturing provider a specification, inputs, constraints, and acceptance tests. You expect an output that can be inspected. You do not expect the provider to discover your entire business model by vibes.</p>
<p>That changes how we write work for agents.</p>
<p>Good agent work packets should include:</p>
<ul>
<li>The desired behavior.</li>
<li>The files and boundaries that matter.</li>
<li>The interfaces that must not change.</li>
<li>The tests that prove success.</li>
<li>The policies the output must satisfy.</li>
<li>The artifact expected at the end.</li>
</ul>
<p>If the agent fails, the fix is often not &ldquo;better prompt.&rdquo; The fix is a better production system.</p>
<h2 id="platform-matters-more-than-prompts">Platform matters more than prompts</h2>
<p>This is the main point.</p>
<p>Prompts are instructions. Platforms are manufacturing systems.</p>
<p>A strong platform can make average prompts safer. A weak platform can make clever prompts dangerous. If the output cannot be verified, traced, packaged, promoted, and rolled back, then the organization is not manufacturing software. It is generating code and hoping the rest works out.</p>
<p>The future I want is boring in the best way:</p>
<ul>
<li>Specifications are clear enough for humans and agents.</li>
<li>Code generation is cheap and replaceable.</li>
<li>Verification is automated and hard to bypass.</li>
<li>Artifacts carry provenance and policy results.</li>
<li>Registries become trusted distribution points.</li>
<li>Kubernetes platforms run the production line.</li>
<li>Humans spend more time designing systems and less time manually pushing code through fragile processes.</li>
</ul>
<h2 id="the-shift">The shift</h2>
<p>Software has spent decades optimizing for writing code. The next phase is optimizing for manufacturing software.</p>
<p>That means the winners will not be the teams with the longest prompt libraries. They will be the teams with the best design artifacts, the strongest verification loops, the clearest interfaces, and the most reliable platforms.</p>
<p>When code becomes cheap, quality becomes the product.</p>
<p>And the platform becomes the factory.</p>
]]></content><author><name>Prasanth Baskar</name><email>bupdprasanth@gmail.com</email></author><category term="platform-engineering"/><category term="ai"/><category term="kubernetes"/><category term="supply-chain"/><category term="harbor"/><summary type="html">What changes when code becomes cheap and software needs manufacturing systems instead of heroic production?</summary><media:thumbnail xmlns:media="http://search.yahoo.com/mrss/" url="https://avatars.githubusercontent.com/u/89722848?v=4"/><media:content medium="image" url="https://avatars.githubusercontent.com/u/89722848?v=4" xmlns:media="http://search.yahoo.com/mrss/"/></entry><entry><title type="html">How to Run Github Actions Locally??</title><link href="https://bupd.xyz/blogs/how-to-run-github-actions-locally/" rel="alternate" type="text/html" title="How to Run Github Actions Locally??"/><published>2025-10-15T10:06:34Z</published><updated>2026-06-10T00:37:32Z</updated><id>https://bupd.xyz/blogs/how-to-run-github-actions-locally/</id><content type="html" xml:base="https://bupd.xyz/blogs/how-to-run-github-actions-locally/"><![CDATA[<p>This blog is written to serve people who are looking to run github actions locally for faster developer workflows and not get into the &ldquo;push and pray&rdquo; hell. No more 50 commits to make the actions work &ndash; simply run GitHub Actions locally!! with <a href="https://nektosact.com/">act</a>.</p>
<p>If you want to test GitHub Actions without constantly pushing commits, <strong><a href="https://nektosact.com/">act</a></strong> is the tool you need. It runs your workflows locally, using the same environment GitHub provides, so you get instant feedback and can debug faster.</p>
<h2 id="steps-to-use-act">Steps to Use Act</h2>
<ol>
<li>
<p><strong>Install Act</strong>
Follow instructions on <a href="https://github.com/nektos/act">act&rsquo;s official repo</a> to install it on your system.</p>
</li>
<li>
<p><strong>Run Your Workflows</strong>
Inside your project, run:</p>
</li>
</ol>
<div class="highlight"><pre tabindex="0" class="chroma"><code class="language-bash" data-lang="bash"><span class="line"><span class="cl">act
</span></span></code></pre></div><p>This executes the workflows defined in <code>.github/workflows/</code> locally.</p>
<p>That&rsquo;s it. No pushing, no waiting &ndash; just run your GitHub Actions locally and get faster feedback.</p>
<h3 id="links">Links</h3>
<ul>
<li><a href="https://nektosact.com/">Act Official Site</a></li>
<li><a href="https://github.com/nektos/act">GitHub Repository</a></li>
</ul>
]]></content><author><name>Prasanth Baskar</name><email>bupdprasanth@gmail.com</email></author><category term="github"/><category term="githubactions"/><category term="git"/><summary type="html">Run GitHub Actions locally with act instead of pushing commits just to debug workflows.</summary><media:thumbnail xmlns:media="http://search.yahoo.com/mrss/" url="https://avatars.githubusercontent.com/u/89722848?v=4"/><media:content medium="image" url="https://avatars.githubusercontent.com/u/89722848?v=4" xmlns:media="http://search.yahoo.com/mrss/"/></entry><entry><title type="html">Geek's Guide to Kubernetes Image Credential Provider Plugins: No Bloat</title><link href="https://bupd.xyz/blogs/geeks-guide-to-kubernetes-image-credential-provider-plugins-no-bloat/" rel="alternate" type="text/html" title="Geek's Guide to Kubernetes Image Credential Provider Plugins: No Bloat"/><published>2025-08-30T19:02:50Z</published><updated>2026-06-10T00:37:32Z</updated><id>https://bupd.xyz/blogs/geeks-guide-to-kubernetes-image-credential-provider-plugins-no-bloat/</id><content type="html" xml:base="https://bupd.xyz/blogs/geeks-guide-to-kubernetes-image-credential-provider-plugins-no-bloat/"><![CDATA[<p>I spent more than 8 hours wrestling with Kubernetes image credential provider plugins before finally stumbling upon the real solution. If you think this is as simple as dropping a config into <a href="https://kind.sigs.k8s.io/">Kind</a> or <a href="https://minikube.sigs.k8s.io/docs/start/">Minikube</a> think again. It doesn&rsquo;t work that way, and I&rsquo;d rather save you the wasted time I went through.</p>
<p>This guide comes from someone who considers a debugger &ldquo;bloat.&rdquo; If you share that mindset, you&rsquo;ll feel right at home.</p>
<p>In this blog, I will walk you step by step through setting up a <a href="https://kubernetes.io/docs/tasks/administer-cluster/kubelet-credential-provider/">Kubernetes image credential provider plugin</a> in a Kind cluster. We&rsquo;ll manually configure the Kubelet to use your <a href="https://github.com/bupd/k8stemps/blob/main/credential-provider-plugin/main.go">custom credential provider plugin</a>. no shortcuts, no bloat, just the essentials.</p>
<h2 id="step-1">Step 1</h2>
<p>Create your Cluster.</p>
<p>I am going for a basic three-node cluster to work with. Use the following configuration to spin it up. This setup includes one control-plane node and two worker nodes. feel free to add more configs if you want.</p>
<div class="highlight"><pre tabindex="0" class="chroma"><code class="language-yaml" data-lang="yaml"><span class="line"><span class="cl"><span class="nt">kind</span><span class="p">:</span><span class="w"> </span><span class="l">Cluster</span><span class="w">
</span></span></span><span class="line"><span class="cl"><span class="w"></span><span class="nt">apiVersion</span><span class="p">:</span><span class="w"> </span><span class="l">kind.x-k8s.io/v1alpha4</span><span class="w">
</span></span></span><span class="line"><span class="cl"><span class="w"></span><span class="nt">nodes</span><span class="p">:</span><span class="w">
</span></span></span><span class="line"><span class="cl"><span class="w"></span>- <span class="nt">role</span><span class="p">:</span><span class="w"> </span><span class="l">control-plane</span><span class="w">
</span></span></span><span class="line"><span class="cl"><span class="w"></span>- <span class="nt">role</span><span class="p">:</span><span class="w"> </span><span class="l">worker</span><span class="w">
</span></span></span></code></pre></div><h2 id="step-2">Step 2</h2>
<p>Copy the Credential Provider Plugin Binary and Config to all the nodes.</p>
<p>You can also use a daemonset to do this in production. but I have gone with simple docker cp. Because we are still in the development stage of the credential-provider-plugin. I have my credentilal-plugin and config in a directory</p>
<div class="highlight"><pre tabindex="0" class="chroma"><code class="language-bash" data-lang="bash"><span class="line"><span class="cl">ls -la credential-provider-plugin
</span></span><span class="line"><span class="cl">
</span></span><span class="line"><span class="cl"><span class="c1"># copy the entire folder into k8s nodes</span>
</span></span><span class="line"><span class="cl">docker cp ./credential-provider-plugin kind-control-plane:/etc/kubernetes/credential-providers
</span></span></code></pre></div><h2 id="step-3">Step 3</h2>
<p>Modify the Kubelet Configuration.</p>
<p>The real fun begins now. The Kubelet&rsquo;s configuration on a kind cluster is managed by a file called <code>kubeadm-flags.env</code>. We need to pull this file from the control-plane node, modify it, and push it back.</p>
<p>It will be located in <code>/var/lib/kubelet/kubeadm-flags.env</code>.</p>
<div class="highlight"><pre tabindex="0" class="chroma"><code class="language-bash" data-lang="bash"><span class="line"><span class="cl">docker cp kind-control-plane:/var/lib/kubelet/kubeadm-flags.env ./kubeadm-flags-kind.env
</span></span></code></pre></div><p>Edit the file to include the credential provider flags:</p>
<ul>
<li><code>--image-credential-provider-bin-dir</code>: the directory where our plugin binary resides.</li>
<li><code>--image-credential-provider-config</code>: the path to the configuration file for the plugin.</li>
</ul>
<p>Note: Don&rsquo;t forget to separately quote the values. Seriously, I&rsquo;ve seen two hours vanish because of this.</p>
<p>Before:</p>
<div class="highlight"><pre tabindex="0" class="chroma"><code class="language-text" data-lang="text"><span class="line"><span class="cl">KUBELET_KUBEADM_ARGS=&#34;--node-ip=172.18.0.3 --node-labels= --pod-infra-container-image=registry.k8s.io/pause:3.10.1 --provider-id=kind://docker/kind/kind-control-plane&#34;
</span></span></code></pre></div><p>After:</p>
<div class="highlight"><pre tabindex="0" class="chroma"><code class="language-text" data-lang="text"><span class="line"><span class="cl">KUBELET_KUBEADM_ARGS=&#34;--node-ip=172.18.0.3 --node-labels= --pod-infra-container-image=registry.k8s.io/pause:3.10.1 --provider-id=kind://docker/kind/kind-control-plane --image-credential-provider-bin-dir=&#39;/etc/kubernetes/credential-providers&#39; --image-credential-provider-config=&#39;/etc/kubernetes/credential-providers/config.yml&#39;&#34;
</span></span></code></pre></div><p>Copy the modified file back to the control plane:</p>
<div class="highlight"><pre tabindex="0" class="chroma"><code class="language-bash" data-lang="bash"><span class="line"><span class="cl">docker cp ./kubeadm-flags-kind.env kind-control-plane:/var/lib/kubelet/kubeadm-flags.env
</span></span></code></pre></div><h2 id="step-4">Step 4</h2>
<p>Restart the kubelet.</p>
<div class="highlight"><pre tabindex="0" class="chroma"><code class="language-bash" data-lang="bash"><span class="line"><span class="cl">docker <span class="nb">exec</span> -it kind-control-plane sh
</span></span><span class="line"><span class="cl">systemctl daemon-reload <span class="o">&amp;&amp;</span> systemctl restart kubelet
</span></span></code></pre></div><h2 id="step-5">Step 5</h2>
<p>The most reliable way to verify if your plugin is working is to embed a webhook into it. This allows all inputs and outputs to be sent to a webhook endpoint, giving you a straightforward way to monitor the plugin&rsquo;s execution. While it may feel a bit hacky, i love it.</p>
<p>Another way to test the plugin is by pulling an image that requires the default static credentials configured in your plugin. If the plugin is working correctly, the pod should start successfully with the image, confirming that the pull operation uses the expected credentials.</p>
<p>You can try this by applying the example <a href="https://github.com/bupd/k8stemps/blob/main/sapod-test.yaml"><code>pod.yaml</code></a> file:</p>
<div class="highlight"><pre tabindex="0" class="chroma"><code class="language-bash" data-lang="bash"><span class="line"><span class="cl">kubectl apply -f pod.yaml
</span></span></code></pre></div><p>Once the pod starts, you&rsquo;ll be able to confirm that the hardcoded credentials from the credential-provider-plugin is being used as intended.</p>
<h2 id="bonus">Bonus</h2>
<p>Here is a simple script with which you can automate all this:</p>
<ul>
<li><a href="https://github.com/bupd/k8stemps/blob/c0ffeeba2e0b53e63f69b244e5cc2f7e0e6698c9/test-kind-credential-provider-plugin.sh">https://github.com/bupd/k8stemps/blob/c0ffeeba2e0b53e63f69b244e5cc2f7e0e6698c9/test-kind-credential-provider-plugin.sh</a></li>
</ul>
<h2 id="references">References</h2>
<ul>
<li><a href="https://kubernetes.io/docs/setup/production-environment/tools/kubeadm/control-plane-flags/">https://kubernetes.io/docs/setup/production-environment/tools/kubeadm/control-plane-flags/</a></li>
<li><a href="https://kubernetes.io/docs/reference/command-line-tools-reference/kubelet/">https://kubernetes.io/docs/reference/command-line-tools-reference/kubelet/</a></li>
<li><a href="https://kubernetes.io/docs/setup/production-environment/tools/kubeadm/kubelet-integration/">https://kubernetes.io/docs/setup/production-environment/tools/kubeadm/kubelet-integration/</a></li>
<li><a href="https://kubernetes.io/docs/reference/config-api/kubelet-credentialprovider.v1/#credentialprovider-kubelet-k8s-io-v1-CredentialProviderResponse">https://kubernetes.io/docs/reference/config-api/kubelet-credentialprovider.v1/#credentialprovider-kubelet-k8s-io-v1-CredentialProviderResponse</a></li>
<li><a href="https://github.com/liggitt/kubernetes/tree/0904efcc86d02c8e6b71961ecae92d6cc41ddf40/staging/src/k8s.io/kubelet/cmd/credential-provider-echo-token">credential-provider-echo-token</a></li>
<li><a href="https://github.com/kubernetes/cloud-provider-aws/tree/master/cmd/ecr-credential-provider">ecr credential provider</a></li>
<li><a href="https://github.com/cloudsmith-io/cloudsmith-kubernetes-credential-provider/blob/master/main.go">cloudsmith-kubernetes-credential-provider</a></li>
</ul>
]]></content><author><name>Prasanth Baskar</name><email>bupdprasanth@gmail.com</email></author><category term="kubernetes"/><category term="devops"/><category term="architecture"/><category term="docker"/><summary type="html">A step-by-step Kind setup for Kubernetes image credential provider plugins.</summary><media:thumbnail xmlns:media="http://search.yahoo.com/mrss/" url="https://avatars.githubusercontent.com/u/89722848?v=4"/><media:content medium="image" url="https://avatars.githubusercontent.com/u/89722848?v=4" xmlns:media="http://search.yahoo.com/mrss/"/></entry><entry><title type="html">Programmers are not workhorses</title><link href="https://bupd.xyz/blogs/programmers-are-not-workhorses/" rel="alternate" type="text/html" title="Programmers are not workhorses"/><published>2024-03-26T16:14:55Z</published><updated>2026-06-10T00:37:32Z</updated><id>https://bupd.xyz/blogs/programmers-are-not-workhorses/</id><content type="html" xml:base="https://bupd.xyz/blogs/programmers-are-not-workhorses/"><![CDATA[<h2 id="what">What&hellip;??</h2>
<p>Programmers are a unique breed. We&rsquo;re not just following orders and churning out code. We&rsquo;re <strong>creative problem-solvers</strong> who build the digital world around us.</p>
<p>Ever wondered why that app works so flawlessly or that website is so intuitive? That&rsquo;s the handiwork of programmers.</p>
<p>As programmers/coders we tend to take complex challenges and break them down into elegant solutions.</p>
<p>Sure, code is our language, but our minds are constantly buzzing with ideas. We might even catch ourselves thinking about code in the shower! Or even catch thinking about code even when watching a movie. The desire to learn and improve is ingrained in us. New technologies are like shiny objects to us, and we can&rsquo;t wait to tinker and see what they can do.</p>
<p>But here&rsquo;s the thing: being a programmer isn&rsquo;t about burying yourself in code 24/7. It&rsquo;s about finding a great place to bury yourself within the code It&rsquo;s about burying yourself with what you love.</p>
<p>While some might assume we only talk about code, it&rsquo;s because we&rsquo;re passionate! We want to share our knowledge and the excitement of building something cool.</p>
<p>Think of us&hellip; as artists. We craft functional masterpieces with lines of code. We take pride in making things not just work, but create bugs beautifully.</p>
<p>You may think I am romanticizing the term programmer. well actually, Programming is not like any other job. It is different I mean <strong>It is different</strong>.</p>
<p>I mostly hang around with people who does not have a programming background.</p>
<p>I note some strange things with them and our work life as a programmer.</p>
<ul>
<li>There is a huge issue in the programming field.</li>
<li>the programming field is inflated to the curve than any other fields.</li>
</ul>
<p>Does that mean programmers are earning more than their worth. NO, not actually there are programmers which do not see programming as a job. They see programming as fun. But they do take coding their career. So WHAT.</p>
<p>We as programmers have an innate problem within ourselves.</p>
<h2 id="working-and-thinking-about-code-all-the-time">Working and thinking about code all the time.</h2>
<p>Have you ever had shower thoughts about your code. or the error you need to fix by the end of day. The coding side got into your social life so well, that you cannot say it&rsquo;s not.</p>
<p>I have a friend who is studying commerce and I speak about how I solved all this coding problems in leetcode or how I manage to fix a bug in production and I do talked about my cloud bills too. He also knows the new shiny thing that came around in js ecosystem. All because of me.</p>
<p>I also had convos with my friends, where I say about my neovim config and tmux. and why ARCH LINUX is tippy-top of all distros.</p>
<p>How well I manage my productivity with my configs and how each of those scripts integrates with my workflow. And how well arch linux is constructed and the philosophy of unix. All of these things. I know for sure, that he doesn&rsquo;t understand a single word am talking about linux. In fact, he doesn&rsquo;t even have a computer, when I come to think of it.</p>
<p>But, you get the point right..!</p>
<h2 id="all-i-talk-about-is-programming">All I talk about is programming:</h2>
<p>I have less friends because whatever comes to my mind is about programming why is that should be like that. Does that mean I do not have a life.</p>
<p>You should be heard that experienced people and seniors saying code code code, code-more and think about code all the time.</p>
<ul>
<li>code</li>
<li>code</li>
<li>code more and more code</li>
<li>do side projects,</li>
<li>more side projects, and a good side project</li>
<li>problem-solving</li>
<li>solve problems, think like a compiler, leetcode</li>
<li>grind leetcode etc etc., All the time.</li>
</ul>
<p>grind leetcode. Do mock interviews do side projects in your free time. build stuffs with programming. Build the stuffs you wish you had.</p>
<h2 id="why-is-it-always-should-be-about-programming">Why is it always should be about programming.</h2>
<p>For a person working as a doctor, he doesn&rsquo;t go around giving injections/medications to people for hobby or he doesn&rsquo;t do operations as a side project. This may not be an apt example. But bear with me.</p>
<p>Most of programmers have programming as their hobby, as their work, as their life and maybe who knows as their wife too, no sorry as their <strong>enjoyment</strong> too. they do only one thing and that is <strong>code</strong>. either they are in a party or they are in their basement all they think is about programming. Invest more time put more time in your craft why does it need to be like that.</p>
<p>Why does it always need to be about Code..?</p>
<p>Since Mechanical or Electrical Engineers or any sort of engineering rather than software. They work for 8-10 hours per day and they don&rsquo;t even think of their work after that period of time. They have their anxiety too low compared to programmers.</p>
<p>Take hard workers such as cleaners, gardeners, carpenters etc., these jobs don&rsquo;t require too much skills and they don&rsquo;t grind like a leetcoder. Comparing to these people we as programmers tend to work more, think more, and do less but why is that should be like that. We too humans right.</p>
<p>Why we need to think of programming all the time and learn new technologies and go deepen our knowledge. why is that.</p>
<p>I repeat.</p>
<h2 id="programmers-are-not-workhorses">Programmers are not workhorses.</h2>
<p>Think of a man who works in the KFC or McDonald he tend to earn less than a average programmer. But he tend to do more physical work than a programmer.</p>
<p>We programmers are artists. <strong>We create art</strong>. we live with the computer. Which have delicate parts and mechanical keyboards which has delicacy sounding keys. which is in no comparison with the carpenter or a mechanic using their tools. they tend to do a lot of physical work compared to us.</p>
<blockquote>
<p>The more delicate the work, the greater the requirement for creativity and artistry. As a programmer, I consider myself an artist, meticulously crafting solutions with the precision and finesse akin to that of a painter with their brush.</p></blockquote>
<p>that&rsquo;s why I tend to go around with arch linux and neovim spending my life configuring it.</p>
<p>Where each of my keystrokes are intended to do great things and each of them have such a delicacy improving my <strong>productivity</strong> in programming.</p>
<p>These thoughts came into my mind, When I was sitting in my class bored and heard someone say put your life into programming&hellip; I asked why. but he didn&rsquo;t have an answer neither do I. But now I had found the answer that putting your life into the programming is worth more than you think. because you are not spending your life doing dumb chores. You are not replaceable. you are an artist creating an art. An art that makes people life easier. and productive.</p>
<p>Human life span is limited we didn&rsquo;t have endless amount of years to live we live only for a short time. The amount of things we accomplish is fully dependent on the scale of how productive we are.</p>
<p>So, bupd at the eod what are you trying to say are you trying to say that programmers need to devote their lives for programming no it&rsquo;s not what i mean. Its absolutely against my point.</p>
<h2 id="so-what-i-mean">So What I mean:</h2>
<p>If you are enthusiastic enough and if the programming is the right thing for you. You tend to go over the large problems and you may try to create all of it by yourself. <strong>&ldquo;YOU will enjoy more than you think by reinventing the wheel rather than creating a crud app&rdquo;</strong>.</p>
<p>Thanks have a great day.</p>
<p>-bupd.</p>
]]></content><author><name>Prasanth Baskar</name><email>bupdprasanth@gmail.com</email></author><category term="programming"/><category term="productivity"/><category term="softwaredevelopment"/><category term="archlinux"/><summary type="html">A personal note on programming as creative work, not just endless grinding.</summary><media:thumbnail xmlns:media="http://search.yahoo.com/mrss/" url="https://avatars.githubusercontent.com/u/89722848?v=4"/><media:content medium="image" url="https://avatars.githubusercontent.com/u/89722848?v=4" xmlns:media="http://search.yahoo.com/mrss/"/></entry><entry><title type="html">Contribute to Zulip: A Beginner's Guide</title><link href="https://bupd.xyz/blogs/contribute-to-zulip-a-beginners-guide/" rel="alternate" type="text/html" title="Contribute to Zulip: A Beginner's Guide"/><published>2024-03-25T16:56:52Z</published><updated>2026-06-10T00:37:32Z</updated><id>https://bupd.xyz/blogs/contribute-to-zulip-a-beginners-guide/</id><content type="html" xml:base="https://bupd.xyz/blogs/contribute-to-zulip-a-beginners-guide/"><![CDATA[<p>Are you eager to contribute to the vibrant Zulip open-source community but intimidated by the initial setup process? Fear not! This beginner-friendly guide will walk you through the essential steps, overcoming common setup challenges and empowering you to make your first meaningful contribution to Zulip.</p>
<h2 id="the-hard-way">The Hard Way:</h2>
<p><a href="https://zulip.readthedocs.io/en/latest/"><strong><em>[Read the Docs]</em></strong></a> The best resource you will ever find!</p>
<h2 id="understanding-the-initial-setup-challenge">Understanding the Initial Setup Challenge:</h2>
<h3 id="the-roadblock">The Roadblock:</h3>
<p>One of the primary hurdles for new contributors is the initial setup, which can be perceived as challenging and time-consuming. This guide will help you navigate through this obstacle, ensuring a smoother onboarding experience.</p>
<h3 id="tools-youll-need">Tools You&rsquo;ll Need:</h3>
<p>Before diving into the setup process, make sure you have Vagrant, <a href="http://Docker.io">Docker.io</a>, and Git.</p>
<div class="highlight"><pre tabindex="0" class="chroma"><code class="language-bash" data-lang="bash"><span class="line"><span class="cl">sudo apt install vagrant docker.io git
</span></span></code></pre></div><p>These tools are essential for creating a development environment for Zulip.</p>
<h2 id="the-solution-overcoming-connection-issues">The Solution: Overcoming Connection Issues</h2>
<div class="highlight"><pre tabindex="0" class="chroma"><code class="language-bash" data-lang="bash"><span class="line"><span class="cl"><span class="c1"># the only commands you will need</span>
</span></span><span class="line"><span class="cl">vagrant up
</span></span><span class="line"><span class="cl">vagrant provision
</span></span><span class="line"><span class="cl">vagrant ssh
</span></span><span class="line"><span class="cl">
</span></span><span class="line"><span class="cl"><span class="o">(</span>env<span class="o">)</span>
</span></span><span class="line"><span class="cl">./tools/run-dev
</span></span></code></pre></div><p>If any error occurs while developing read the docs or just google it.</p>
<p><strong>Beware! Blindly running commands can severely damage your system, even with the help of large language models like GPT and Bard.</strong> I experienced this firsthand and am writing this to prevent others from making the same mistake.</p>
<h3 id="a-frustrating-journey">A Frustrating Journey:</h3>
<p>Many contributors, including myself, have faced connectivity issues while setting up Zulip. Despite thorough documentation readings, some errors may persist, leaving you feeling stranded.</p>
<h3 id="seeking-help">Seeking Help:</h3>
<p>Don&rsquo;t hesitate to reach out for assistance. The Zulip community has dedicated channels for learning, and the documentation provides in-depth information. If you encounter difficulties, don&rsquo;t panic others might be facing the same issues.</p>
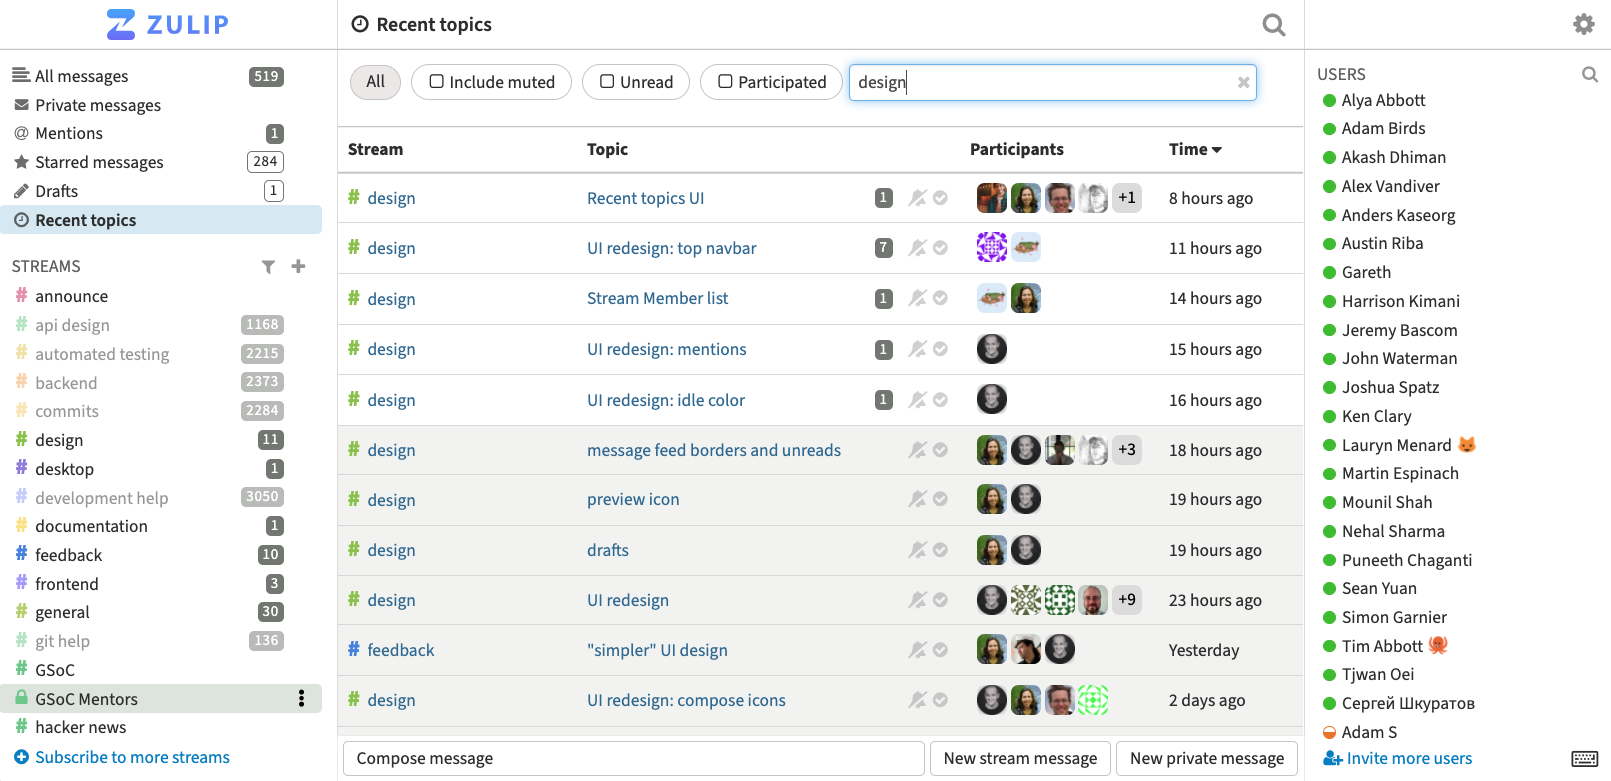
<p><img src="https://gdm-catalog-fmapi-prod.imgix.net/ProductScreenshot/f7798cb9-ad0e-4bd3-80b2-eb7a498219ec.png?auto=format&amp;q=50" alt="Zulip Software - 2023 Reviews, Pricing &amp; Demo"></p>
<p>Ok then Lets start with the development <code>vagrant up --provider=docker</code> start with this.</p>
<div class="highlight"><pre tabindex="0" class="chroma"><code class="language-text" data-lang="text"><span class="line"><span class="cl">Step 1/8 : FROM ubuntu:20.04
</span></span><span class="line"><span class="cl"> ---&gt; 83a4bf3bb050
</span></span><span class="line"><span class="cl">Step 2/8 : ARG UBUNTU_MIRROR
</span></span><span class="line"><span class="cl"> ---&gt; Using cache
</span></span><span class="line"><span class="cl"> ---&gt; 22f35a6c2e5c
</span></span><span class="line"><span class="cl">Step 3/8 : RUN echo locales locales/default_environment_locale select C.UTF-8 | debconf-set-selections &amp;&amp; echo locales locales/locales_to_be_generated select &#34;C.UTF-8 UTF-8&#34; | debconf-set-selections &amp;&amp; { [! &#34;$UBUNTU_MIRROR&#34;] || sed -i &#34;s|http://\(\w*\.\)*archive\.ubuntu\.com/ubuntu/\? |$UBUNTU_MIRROR |&#34; /etc/apt/sources.list; } &amp;&amp; printf &#39;y\n\n&#39; | unminimize &amp;&amp; apt-get install --no-install-recommends -y ca-certificates curl locales openssh-server python3 sudo systemd &amp;&amp; rm -rf /var/lib/apt/lists/*
</span></span><span class="line"><span class="cl"> ---&gt; Using cache
</span></span><span class="line"><span class="cl"> ---&gt; 751b95a0cf53
</span></span><span class="line"><span class="cl">Step 4/8 : ARG VAGRANT_UID
</span></span><span class="line"><span class="cl"> ---&gt; Using cache
</span></span><span class="line"><span class="cl"> ---&gt; 7a89701b804e
</span></span><span class="line"><span class="cl">Step 5/8 : RUN dpkg-divert --add --rename /bin/systemctl &amp;&amp; curl -fLsS --retry 3 -o /bin/systemctl &#39;https://raw.githubusercontent.com/gdraheim/docker-systemctl-replacement/v1.5.7106/files/docker/systemctl3.py&#39; &amp;&amp; echo &#39;7479f4cd0d1604e5c5eb5329f0a6a3a80fea811e2f9889e3083c2c29b229ff99 /bin/systemctl&#39; | sha256sum -c &amp;&amp; chmod +x /bin/systemctl &amp;&amp; ln -nsf /bin/true /usr/sbin/policy-rc.d &amp;&amp; mkdir -p /run/sshd &amp;&amp; ln -ns /lib/systemd/system/postgresql@.service /etc/systemd/system/multi-user.target.wants/postgresql@12-main.service &amp;&amp; useradd -ms /bin/bash -u &#34;$VAGRANT_UID&#34; vagrant &amp;&amp; mkdir -m 700 ~vagrant/.ssh &amp;&amp; curl -fLsS --retry 3 -o ~vagrant/.ssh/authorized_keys &#39;https://raw.githubusercontent.com/hashicorp/vagrant/be7876d83644aa6bdf7f951592fdc681506bcbe6/keys/vagrant.pub&#39; &amp;&amp; chown -R vagrant: ~vagrant/.ssh &amp;&amp; echo &#39;vagrant ALL=(ALL) NOPASSWD:ALL&#39; &gt; /etc/sudoers.d/vagrant
</span></span><span class="line"><span class="cl"> ---&gt; Running in 61d245ae69d6
</span></span><span class="line"><span class="cl">Adding &#39;local diversion of /bin/systemctl to /bin/systemctl.distrib&#39;
</span></span><span class="line"><span class="cl">curl: (35) OpenSSL SSL_connect: Connection reset by peer in connection to raw.githubusercontent.com:443
</span></span></code></pre></div><p>You will be greeted with the above error!</p>
<h3 id="the-vpn-solution">The VPN Solution:</h3>
<p>One effective solution to resolve connection problems is to use a Virtual Private Network (VPN). I personally recommend using ProtonVPN, which offers a free tier. Alternatively, consider the flatpak version of ProtonVPN for a hassle-free experience.</p>
<h3 id="implementation">Implementation:</h3>
<ol>
<li>Install a VPN, for example ProtonVPN.</li>
<li>Create a VPN connection with OpenVPN.</li>
<li>Verify the VPN connection to an available server.</li>
</ol>
<h2 id="docker-build-process-an-overview">Docker Build Process: An Overview</h2>
<h3 id="dockerfile-modifications-optional">Dockerfile Modifications: optional</h3>
<p>Inspecting the Dockerfile reveals steps to set up the Zulip development environment. The initial setup might fail due to SSL connection issues during the Docker build process.</p>
<h3 id="resolving-ssl-connection-issues">Resolving SSL Connection Issues:</h3>
<p>To tackle SSL connection problems during the Docker build, ensure your <strong>VPN</strong> is active. This simple step can save you from hours of troubleshooting.</p>
<h2 id="completing-the-setup">Completing the Setup:</h2>
<h3 id="vagrant-up">Vagrant Up:</h3>
<p>After resolving the initial setup challenges, proceed with executing <code>vagrant up --provider=docker</code>. If any errors occur, don&rsquo;t be discouraged. Retry the command with <code>vagrant provision</code>.</p>
<h3 id="successful-completion">Successful Completion:</h3>
<p>Upon successful execution of the <code>vagrant provision</code> command, you&rsquo;ll receive a message indicating the completion of the development setup. Though it might take some time, the wait is worthwhile.</p>
<h3 id="running-zulip">Running Zulip:</h3>
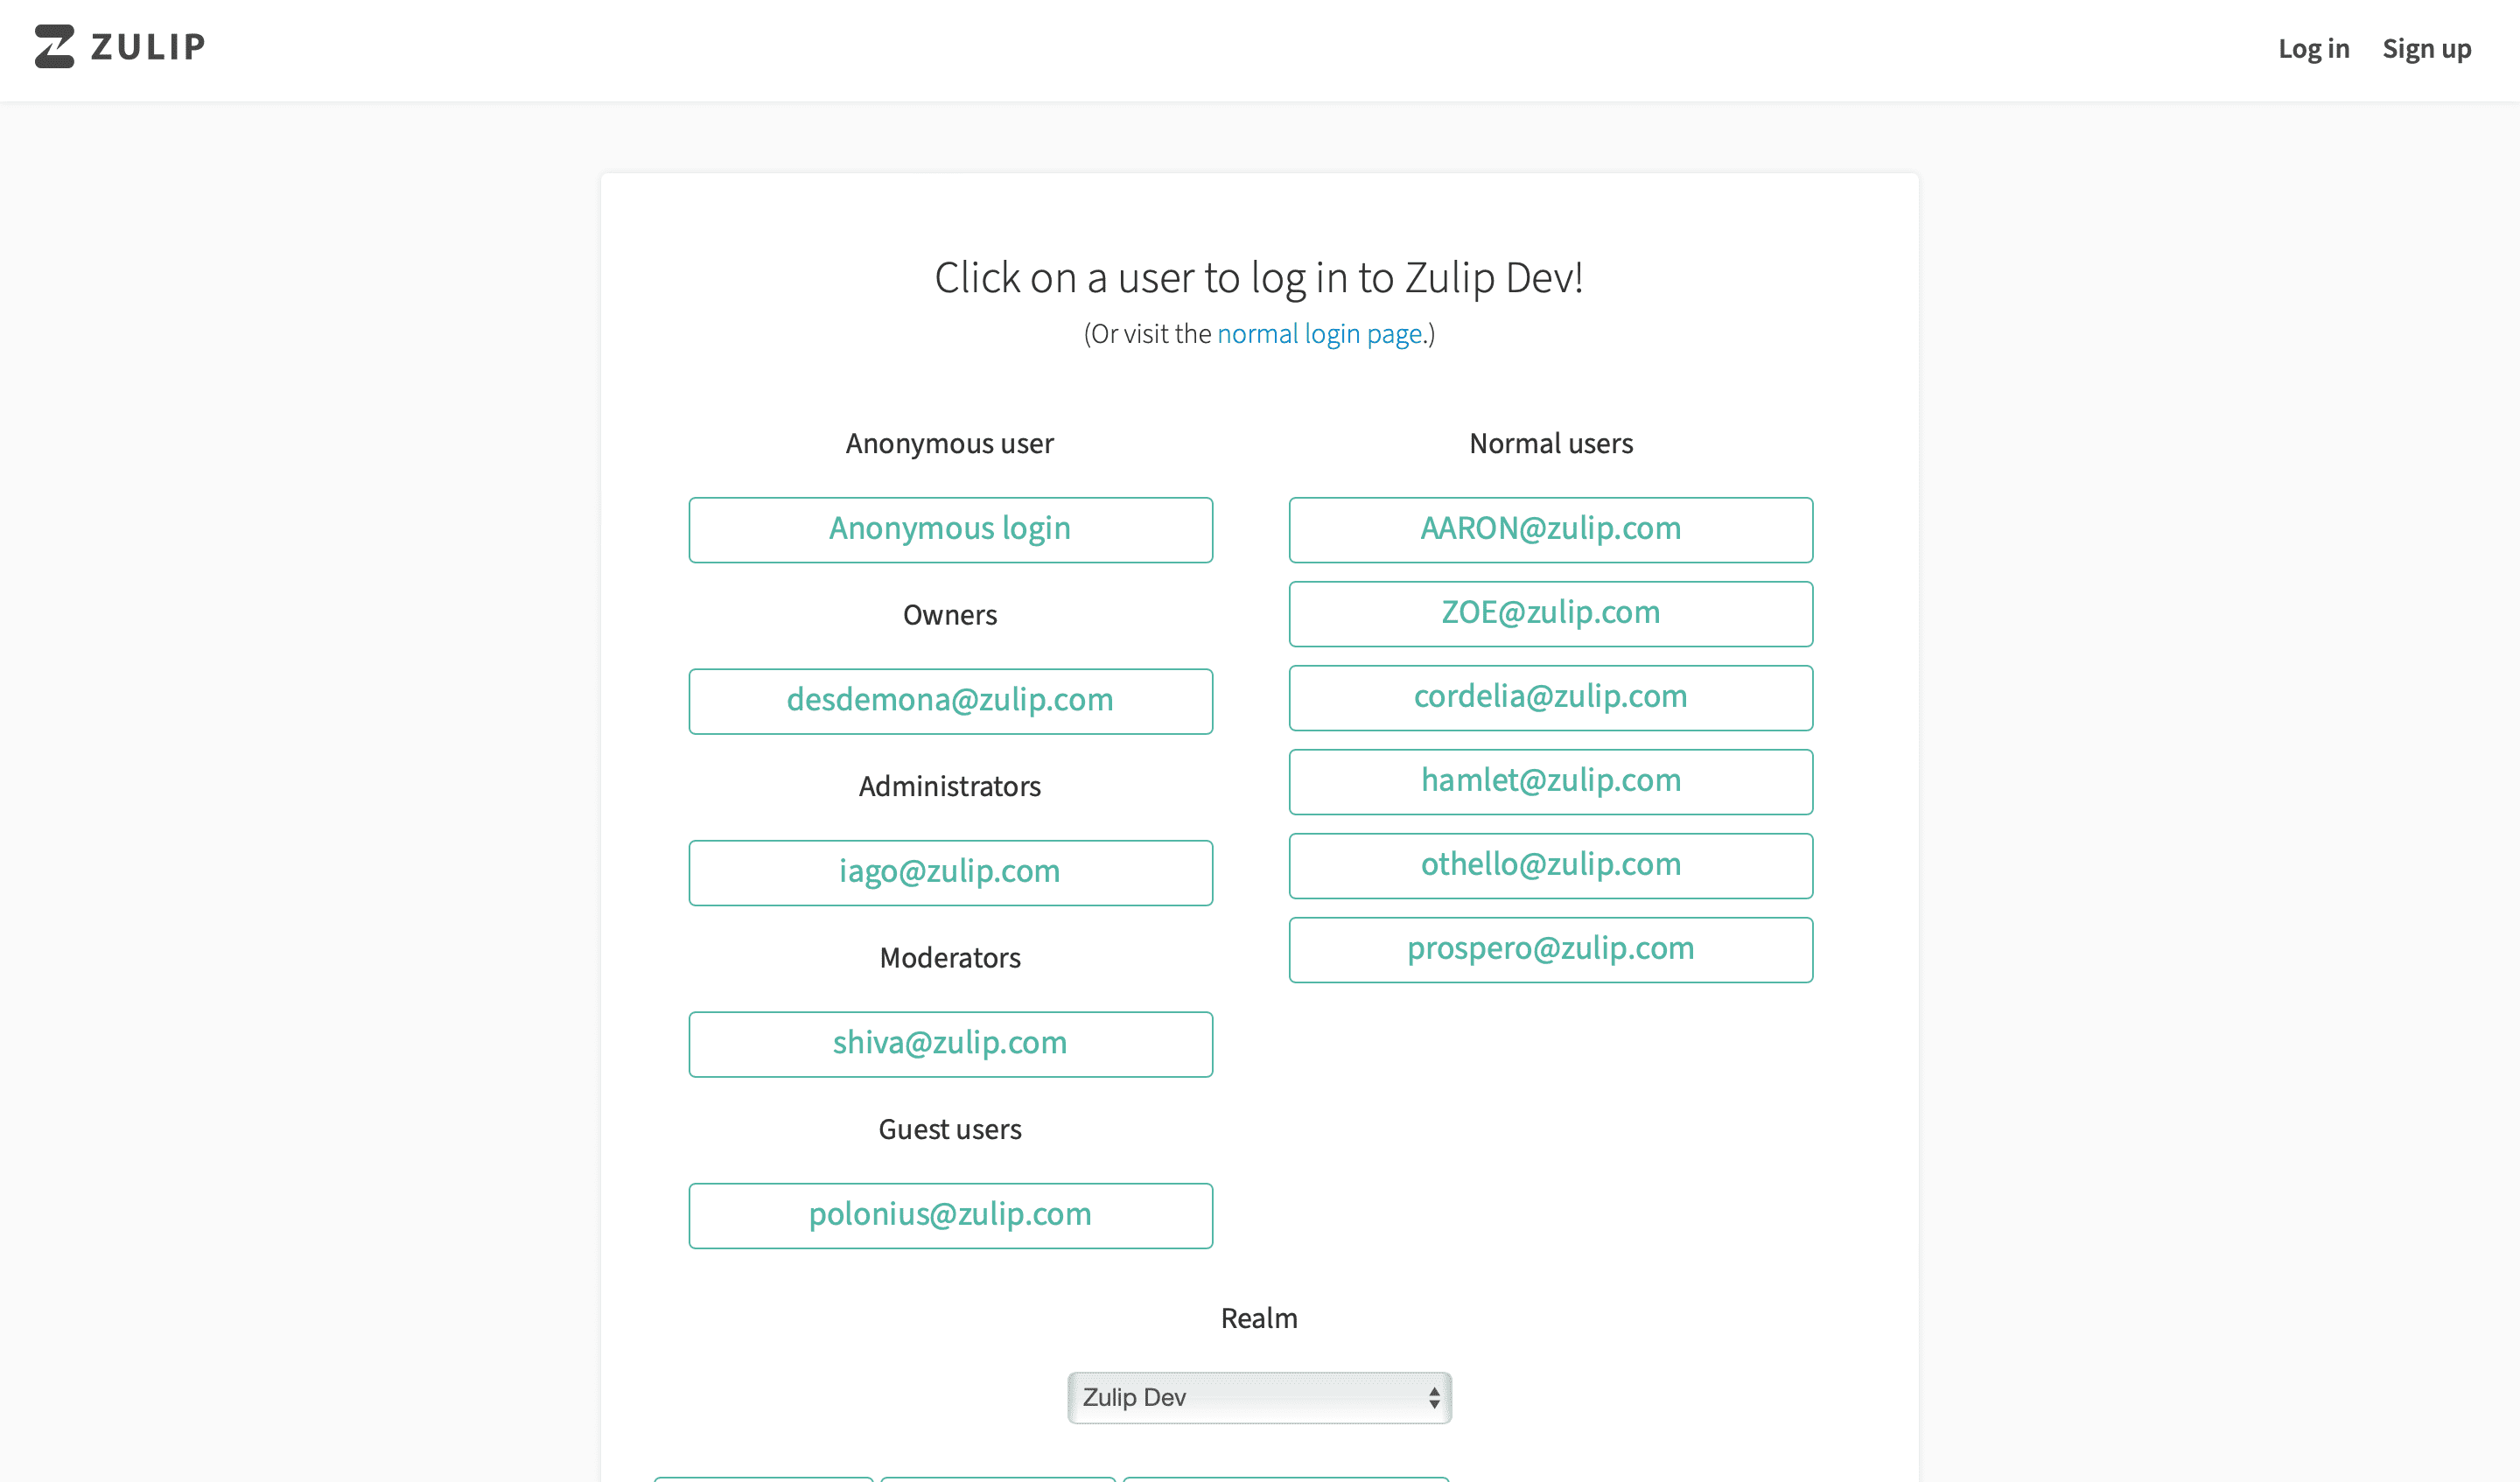
<p>Initiate the Zulip server by running <code>vagrant ssh</code> and then <code>./tools/run-dev</code>. Visit <a href="http://localhost:9991/devlogin"><code>localhost:9991/devlogin</code></a> to witness the successful setup, confirming your readiness to contribute.</p>
<p><img src="https://zulip.readthedocs.io/en/latest/_images/zulip-devlogin.png" alt="Image of Zulip devlogin"></p>
<h3 id="celebrate-your-success">Celebrate Your Success:</h3>
<p>Congratulations! You&rsquo;ve conquered the initial setup challenges and are now ready to dive into <strong>Zulip</strong> development. This experience not only enhances your coding skills but also exposes you to best practices in open-source contribution.</p>
<h3 id="embrace-the-journey">Embrace the Journey:</h3>
<p>Zulip&rsquo;s community is supportive, and your journey as a contributor has just begun. Continue exploring, learning, and engaging with the community to become a proficient developer with Zulip.</p>
<p>By following these steps, you&rsquo;ve taken a significant stride towards becoming a 10x developer in the world of open source. Happy coding!</p>
]]></content><author><name>Prasanth Baskar</name><email>bupdprasanth@gmail.com</email></author><category term="opensource"/><category term="zulip"/><category term="docker"/><category term="vagrant"/><summary type="html">A beginner-friendly guide to getting through Zulip's initial open source development setup.</summary><media:thumbnail xmlns:media="http://search.yahoo.com/mrss/" url="https://avatars.githubusercontent.com/u/89722848?v=4"/><media:content medium="image" url="https://avatars.githubusercontent.com/u/89722848?v=4" xmlns:media="http://search.yahoo.com/mrss/"/></entry><entry><title type="html">Bypass Website Paywalls &amp; Sign Up to Continue with this Simple Hack</title><link href="https://bupd.xyz/blogs/bypass-website-paywalls-sign-up-to-continue-with-this-simple-hack/" rel="alternate" type="text/html" title="Bypass Website Paywalls &amp; Sign Up to Continue with this Simple Hack"/><published>2023-11-19T13:47:07Z</published><updated>2026-06-10T00:37:32Z</updated><id>https://bupd.xyz/blogs/bypass-website-paywalls-sign-up-to-continue-with-this-simple-hack/</id><content type="html" xml:base="https://bupd.xyz/blogs/bypass-website-paywalls-sign-up-to-continue-with-this-simple-hack/"><![CDATA[<p><img src="https://dev-to-uploads.s3.amazonaws.com/uploads/articles/52vqiw10rfz4n2mbe5l8.jpg" alt="A Hacker looking through websites trying to bypass the paywall"></p>
<p>In the vast expanse of the internet, a treasure trove of knowledge lies hidden behind paywalls and subscription fees. If you&rsquo;ve ever encountered a frustrating &ldquo;<strong>Sign Up to Continue</strong>&rdquo; prompt when trying to access an informative blog post or a valuable article, you know the feeling of being locked out of valuable information. But fear not, for there exists a surprisingly simple hack that empowers you to bypass these barriers and access the knowledge you seek.</p>
<p><strong>The Hack: Unmasking Hidden Content</strong></p>
<p>This hack, often overlooked by savvy tech enthusiasts, involves utilizing the developer tools in your browser to manipulate the website&rsquo;s code. It&rsquo;s a technique that can be applied to a variety of websites, particularly those developed by inexperienced or lazy developers (a.k.a soydevs).</p>
<p><strong>Step-by-Step Guide to Unlocking Hidden Content</strong></p>
<ol>
<li><strong>Open the Developer Tools:</strong> Right-click anywhere on the webpage and select &ldquo;Inspect Element&rdquo; from the context menu <strong>Or</strong> Just press &ldquo;F12&rdquo;. This will open the developer tools panel.</li>
<li><strong>Locate the Hidden Content:</strong> Navigate to the &ldquo;Elements&rdquo; tab in the developer tools panel. This will display the website&rsquo;s HTML code. Start searching for the div elements that contain the hidden content. Div elements are often used to structure and organize content on webpages.</li>
<li><strong>Identify the Target Div:</strong> Once you&rsquo;ve located the div elements, identify the one that contains the specific content you want to access. This div will typically have a different style or class than the surrounding divs.</li>
<li><strong>Modify the Div&rsquo;s Position:</strong> Right-click on the target div and select &ldquo;Inspect&rdquo; from the context menu. This will display the div&rsquo;s properties. Look for the &ldquo;position&rdquo; property and change its value to &ldquo;absolute&rdquo;. This will bring the div to the forefront of the webpage, making its content visible.</li>
<li><strong>Adjust Other CSS Properties:</strong> If necessary, adjust other CSS properties, such as &ldquo;z-index&rdquo; or &ldquo;overflow&rdquo;, to ensure the hidden content is fully displayed and accessible.</li>
</ol>
<p><strong>Example: Bypassing a Basic Blog Site&rsquo;s Paywall</strong></p>
<p>Imagine a basic blog site that hides its content behind a paywall. The blog post you&rsquo;re interested in is hidden behind a &ldquo;Sign Up&rdquo; prompt. To access the content using the hack:</p>
<ol>
<li>Open the developer tools and navigate to the &ldquo;Elements&rdquo; tab.</li>
<li>Search for the div elements that contain the blog post content.</li>
<li>Identify the div that specifically holds the blog post&rsquo;s text and images.</li>
<li>Right-click on the target div and select &ldquo;Inspect&rdquo;.</li>
<li>Change the value of the &ldquo;position&rdquo; property to &ldquo;absolute&rdquo;.</li>
<li>If necessary, adjust other CSS properties, such as &ldquo;z-index&rdquo; or &ldquo;overflow&rdquo;, to ensure the hidden content is fully displayed.</li>
</ol>
<p>By following these steps, you&rsquo;ve successfully bypassed the paywall and gained access to the blog post&rsquo;s content.</p>
<p><strong>Additional Tips and Tricks</strong></p>
<p>While the above method works effectively in many cases, there may be instances where further tinkering is required. Here are a few additional tips to tackle those stubborn paywalls:</p>
<ul>
<li><strong>Disable JavaScript:</strong> Sometimes, websites use JavaScript to dynamically hide or disable content. Temporarily disabling JavaScript can reveal hidden elements.</li>
<li><strong>Check for Z-Index:</strong> The Z-index property determines the stacking order of elements. If the content div has a lower Z-index than other elements, try increasing its Z-index to bring it to the front.</li>
<li><strong>Modify Overflow:</strong> If the content is hidden within a scrollable container, setting the &ldquo;overflow&rdquo; property to &ldquo;visible&rdquo; or &ldquo;auto&rdquo; can make it visible.</li>
</ul>
<p><strong>Caution: Not a Universal Solution</strong></p>
<p>It&rsquo;s important to note that this hack may not work on all websites, particularly those with more sophisticated security measures or complex code structures. However, it&rsquo;s a valuable tool to have in your arsenal when dealing with simpler websites that restrict access to information.</p>
<p><strong>Conclusion: Knowledge for All</strong></p>
<p>In a world where knowledge is power, it&rsquo;s crucial to ensure that information remains accessible to all. While websites have the right to monetize their content, they should not create unnecessary barriers that prevent individuals from gaining valuable knowledge.</p>
<p>Let us harness this newfound power responsibly, ensuring that knowledge remains freely accessible for all.</p>
<p>P.S. Want to see more of my work? Checkout: <a href="https://linktr.ee/bupd">https://linktr.ee/bupd</a></p>
]]></content><author><name>Prasanth Baskar</name><email>bupdprasanth@gmail.com</email></author><category term="programming"/><category term="tutorial"/><category term="cybersecurity"/><summary type="html">A browser developer-tools trick for simple client-side content overlays.</summary><media:thumbnail xmlns:media="http://search.yahoo.com/mrss/" url="https://avatars.githubusercontent.com/u/89722848?v=4"/><media:content medium="image" url="https://avatars.githubusercontent.com/u/89722848?v=4" xmlns:media="http://search.yahoo.com/mrss/"/></entry><entry><title type="html">Understanding Closures</title><link href="https://bupd.xyz/blogs/understanding-closures/" rel="alternate" type="text/html" title="Understanding Closures"/><published>2023-08-29T10:03:00Z</published><updated>2026-06-10T00:37:32Z</updated><id>https://bupd.xyz/blogs/understanding-closures/</id><content type="html" xml:base="https://bupd.xyz/blogs/understanding-closures/"><![CDATA[<h2 id="what-is-closures">What is Closures?</h2>
<p>Closures are a foundational concept in JavaScript that allows inner functions to access variables from their parent function&rsquo;s scope, even after the parent function has finished executing. This makes closures a powerful tool for data privacy, callbacks, and functional programming.</p>
<h2 id="why-do-i-need-it">Why do I need it?</h2>
<p>A closure is created when an inner function captures references to variables from an outer function&rsquo;s scope. For example:</p>
<div class="highlight"><pre tabindex="0" class="chroma"><code class="language-js" data-lang="js"><span class="line"><span class="cl"><span class="kd">function</span> <span class="nx">outer</span><span class="p">()</span> <span class="p">{</span>
</span></span><span class="line"><span class="cl">    <span class="kd">let</span> <span class="nx">outerVar</span> <span class="o">=</span> <span class="mi">10</span><span class="p">;</span>
</span></span><span class="line"><span class="cl">
</span></span><span class="line"><span class="cl">    <span class="kd">function</span> <span class="nx">inner</span><span class="p">()</span> <span class="p">{</span>
</span></span><span class="line"><span class="cl">        <span class="nx">console</span><span class="p">.</span><span class="nx">log</span><span class="p">(</span><span class="nx">outerVar</span><span class="p">);</span>
</span></span><span class="line"><span class="cl">    <span class="p">}</span>
</span></span><span class="line"><span class="cl">
</span></span><span class="line"><span class="cl">    <span class="k">return</span> <span class="nx">inner</span><span class="p">;</span> <span class="c1">// We&#39;re returning the inner function itself
</span></span></span><span class="line"><span class="cl"><span class="c1"></span><span class="p">}</span>
</span></span><span class="line"><span class="cl">
</span></span><span class="line"><span class="cl"><span class="c1">// Execution:
</span></span></span><span class="line"><span class="cl"><span class="c1"></span>
</span></span><span class="line"><span class="cl"><span class="kr">const</span> <span class="nx">closureFunction</span> <span class="o">=</span> <span class="nx">outer</span><span class="p">();</span> <span class="c1">// `inner` captures `outerVar`
</span></span></span><span class="line"><span class="cl"><span class="c1"></span><span class="nx">closureFunction</span><span class="p">();</span> <span class="c1">// Output: 10
</span></span></span></code></pre></div><p>In this example, inner is a closure because it references <code>outerVar</code>. Even after outer completes execution, inner maintains access to <code>outerVar</code>.</p>
<p>It is because, When a function is defined within another function and it captures (references) variables from the outer function, a closure is created. The inner function holds a reference to these variables, even if the outer function has completed execution and its variables should normally be garbage-collected. But that does not happen in the case of closures.</p>
<h2 id="access-beyond-execution">Access Beyond Execution:</h2>
<p>This means that even when you call <code>inner()</code> later, long after <code>outer</code> has finished running, inner can still access and use <code>outerVar</code>. This is not how typical variables work, as they are usually disposed of after their parent function completes execution.</p>
<p>Closures offer a way to maintain a connection to variables that would otherwise be gone. They keep the spirit of the enclosing context alive, allowing for powerful programming techniques like private variables, callbacks, and more.</p>
<hr>
<h3 id="data-privacy">Data privacy:</h3>
<p>Closures are used to create private variables and encapsulate data. They allow you to expose only necessary functionality to the outer world while keeping internal state hidden.</p>
<h3 id="callbacks">Callbacks:</h3>
<p>Closures are frequently used in asynchronous programming, such as event handlers and callback functions, to maintain context across time gaps.</p>
<h3 id="functional-programming">Functional programming:</h3>
<p>Closures enable functional programming techniques like <code>currying</code> and <code>memoization</code> by preserving data between function calls.</p>
<h2 id="caution">Caution:</h2>
<p>While closures are powerful, they also require careful consideration of memory management. Since a closure retains references to its enclosing variables, those variables won&rsquo;t be garbage-collected until the closure is no longer accessible. This can lead to memory leaks if closures are not used judiciously.</p>
<h2 id="in-a-nutshell">In a Nutshell</h2>
<blockquote>
<p>Closures are a powerful tool that can be used for data privacy, callbacks, and functional programming. However, it is important to use closures carefully to avoid memory leaks.</p></blockquote>
]]></content><author><name>Prasanth Baskar</name><email>bupdprasanth@gmail.com</email></author><category term="webdev"/><category term="javascript"/><category term="beginners"/><category term="tutorial"/><summary type="html">A short JavaScript closure explanation with a simple outer and inner function example.</summary><media:thumbnail xmlns:media="http://search.yahoo.com/mrss/" url="https://avatars.githubusercontent.com/u/89722848?v=4"/><media:content medium="image" url="https://avatars.githubusercontent.com/u/89722848?v=4" xmlns:media="http://search.yahoo.com/mrss/"/></entry><entry><title type="html">Warning: Using VS Code? You're Missing Out on the Ultimate 10x Developer Hack!</title><link href="https://bupd.xyz/blogs/warning-using-vs-code-youre-missing-out-on-the-ultimate-10x-developer-hack/" rel="alternate" type="text/html" title="Warning: Using VS Code? You're Missing Out on the Ultimate 10x Developer Hack!"/><published>2023-07-16T01:18:54Z</published><updated>2026-06-10T00:37:32Z</updated><id>https://bupd.xyz/blogs/warning-using-vs-code-youre-missing-out-on-the-ultimate-10x-developer-hack/</id><content type="html" xml:base="https://bupd.xyz/blogs/warning-using-vs-code-youre-missing-out-on-the-ultimate-10x-developer-hack/"><![CDATA[<p>Everyone gets tired of the limitations and repetitive tasks of VS Code? It&rsquo;s time to explore an alternative that maximizes your coding potential. In this article, we&rsquo;ll dive into the raw facts about Vim, a powerful text editor that can revolutionize your coding experience. Get ready to discover the practical advantages of Vim over VS Code.</p>
<h2 id="efficiency-and-speed">Efficiency and Speed</h2>
<p>VS Code may provide a visually appealing interface, but it can slow you down. With Vim&rsquo;s keyboard-centric approach, you can navigate and edit code at lightning speed. Every click of the mouse in VS Code adds up, while Vim&rsquo;s keyboard shortcuts allow you to accomplish tasks without wasting precious seconds. Efficiency and speed are the name of the game in Vim.</p>
<h2 id="the-keyboard-driven-revolution">The Keyboard-Driven Revolution</h2>
<p>To truly understand the impact of the keyboard and mouse on coding efficiency, let&rsquo;s visualise the stark contrast between the two:</p>
<p>When using a mouse, you&rsquo;re limited to clicking, scrolling, and dragging. These actions may seem simple, but they add up over time. The constant switching between the keyboard and mouse disrupts your thought process and slows you down. In the fast-paced world of coding, speed is of the essence, and every second counts.</p>
<p><img src="https://dev-to-uploads.s3.amazonaws.com/uploads/articles/lbszzg3cl9tfn5hwdn2e.png" alt="pain"></p>
<p>embracing Vim and mastering the keyboard is not just about speed &ndash; it&rsquo;s about reclaiming your time, focusing on the code, and reducing the strain on your wrist and neck. The mouse may seem harmless, but prolonged use can lead to a literal pain in the&hellip; well, you know where.</p>
<p><img src="https://dev-to-uploads.s3.amazonaws.com/uploads/articles/gky0bawx310mgk94wp8h.png" alt="PainTopVIew"></p>
<p>Think about it: why waste time moving your hand to the mouse, locating buttons, and scrolling through menus when you can achieve the same results with a swift keystroke? By utilising the power of the keyboard, you gain a significant advantage in terms of speed, efficiency, and overall productivity.</p>
<h2 id="minimalist-and-customizable">Minimalist and Customizable</h2>
<p>VS Code often comes bundled with features you may never use, leading to a cluttered environment. Vim takes a minimalist approach, providing only what you need and allowing you to customize it to suit your preferences. Say goodbye to the unnecessary distractions of VS Code and embrace the streamlined efficiency of Vim.</p>
<h2 id="muscle-memory-and-productivity">Muscle Memory and Productivity</h2>
<p>VS Code users often rely heavily on their mouse, constantly switching between keyboard and mouse for different actions. Vim eliminates this interruption by enabling you to perform all operations through the keyboard. Once you develop muscle memory for Vim&rsquo;s commands, your productivity skyrockets. No more fumbling around or wasting time searching for buttons or icons &ndash; Vim puts you in control.</p>
<ul>
<li><a href="https://vim.rtorr.com/">Vim Cheatsheet</a> Access a comprehensive cheatsheet for Vim commands and shortcuts.</li>
<li><a href="https://vim-adventures.com/">Vim Adventures</a> Engage in an interactive game that teaches you Vim in a fun and engaging way.</li>
</ul>
<blockquote>
<p>Remember, the keyboard is where your true coding potential lies.</p></blockquote>
<h2 id="portability-and-wide-adoption">Portability and Wide Adoption</h2>
<p>VS Code is undoubtedly popular, but Vim&rsquo;s influence extends far and wide. It has been around for decades and has a dedicated community that has built a vast ecosystem of plugins and configurations. Vim is available on almost every operating system and is supported in various editors and IDEs. Its wide adoption ensures you can take your Vim skills with you wherever you go.</p>
<h2 id="automation-over-abstraction">Automation over Abstraction</h2>
<p>In the realm of Vim, we reject the allure of abstraction. Instead, we focus on automation. Spend your time crafting efficient shortcuts, automating repetitive tasks, and building a finely tuned coding machine. Why waste hours on abstractions when you can invest that time in creating an environment that accelerates your every move? Vim empowers you to achieve more with less, leaving the VS Code users scratching their heads in disbelief.</p>
<p><img src="https://dev-to-uploads.s3.amazonaws.com/uploads/articles/zguhdbam6othc3m65lkf.jpg" alt="Automation"></p>
<h2 id="the-power-of-vim">The Power of Vim</h2>
<p>VS Code has its strengths, but when it comes to raw efficiency, speed, customization, and portability, Vim takes the lead. By embracing Vim, you unlock the potential to code faster, streamline your workflow, and adapt to different coding environments effortlessly. It&rsquo;s time to explore the raw facts, weigh the benefits, and decide if Vim is the key to unlocking your coding potential.</p>
<p><strong>P.S.</strong> As you finish reading, reflect on your coding experience with VS Code. Consider the time wasted on repetitive tasks and the inefficiencies introduced by relying on the mouse. Vim offers a compelling alternative &ndash; ditch the mouse and experience the raw power of Vim for yourself.</p>
<p>Thank me later!.</p>
]]></content><author><name>Prasanth Baskar</name><email>bupdprasanth@gmail.com</email></author><category term="vscode"/><category term="beginners"/><category term="productivity"/><category term="10xdeveloper"/><summary type="html">A Vim-heavy argument for keyboard-driven editing and less mouse-driven coding.</summary><media:thumbnail xmlns:media="http://search.yahoo.com/mrss/" url="https://avatars.githubusercontent.com/u/89722848?v=4"/><media:content medium="image" url="https://avatars.githubusercontent.com/u/89722848?v=4" xmlns:media="http://search.yahoo.com/mrss/"/></entry></feed>